
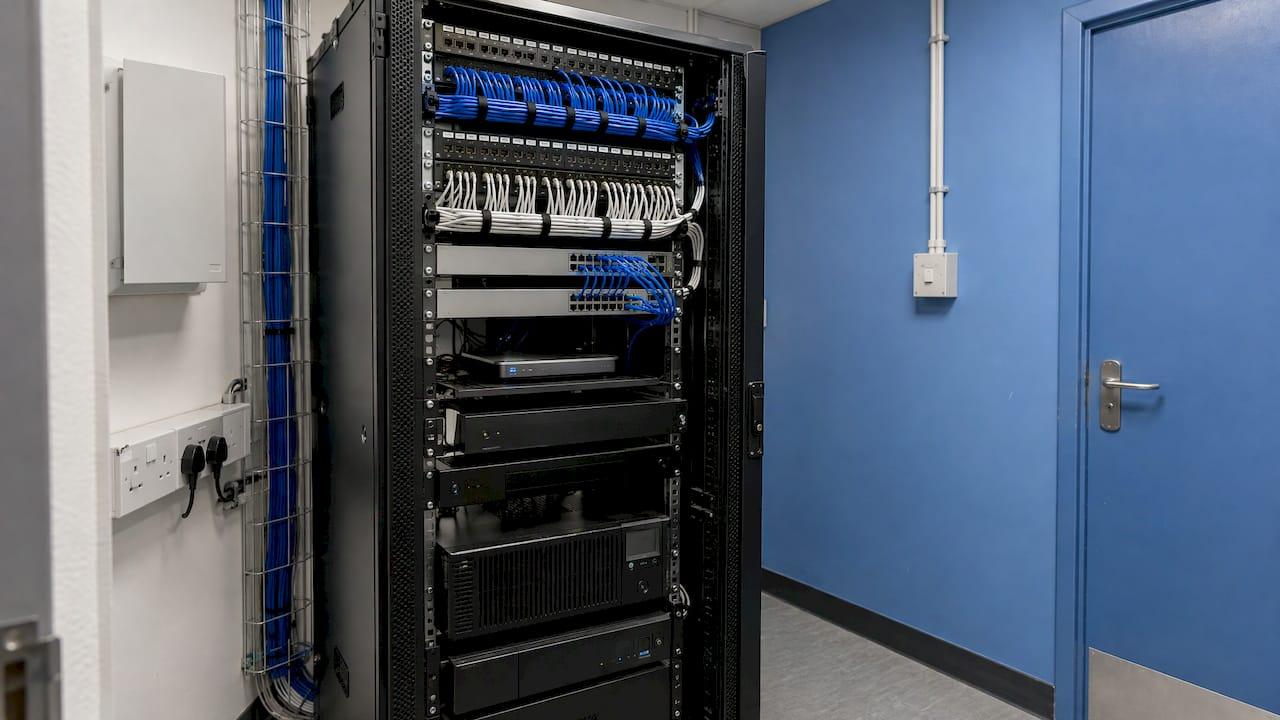
A network rack installation is the job of choosing the right cabinet, fixing it securely in the right room, mounting patch panels and equipment, then terminating, labelling and testing every data point back to it. Done well, it is invisible: the Wi-Fi, CCTV, door entry and phones simply work. Done badly, it becomes a tangle that nobody dares touch. Our engineers design and install structured data networks and Wi-Fi for homes, schools, places of worship and businesses across Liverpool and the North West. The same engineer who specifies the rack fits it, so there is no hand-off between a salesperson and a subcontractor.
TL;DR
- Size the rack for the equipment you have now plus growth: depth and height matter as much as width, and the room needs clear space in front and behind.
- Fix the rack to a solid floor or wall, earth it, and load the heaviest equipment at the bottom first.
- Patch panels go at the top, with a horizontal cable manager between them, and every cable is supported on tray, never by the panel itself.
- Each data point is individually terminated, labelled at both ends and tested with a calibrated tester, with a certificate at the end.
- Our Wi-Fi and structured data networking service covers design, installation and a fixed quotation after a site survey.
Table of Contents
- What a network rack actually does
- Step 1: Plan the rack size and the room
- Step 2: Mount and secure the rack
- Step 3: Lay out patch panels and equipment
- Step 4: Install and terminate the data points
- Step 5: Power, earthing and current UK electrical rules
- Costs and what moves them
- Our view on racks
- Getting a rack installed in Liverpool and the North West
- FAQ
- Sources
What a network rack actually does
A network rack (also called a data cabinet, comms cabinet or server rack, depending on who you ask) is a metal frame or enclosure with standard mounting rails. Everything that needs to be wired together sits in it: patch panels, switches, routers, a UPS (a battery unit that keeps equipment running through a power cut), recorders for CCTV and sometimes servers.
The cables run from the rack to wall outlets in each room. These outlets are the "data points" or "network points". The patch panel is the neat front end of those cables: each cable from a room is terminated on the back of a panel port, and a short patch lead connects the front of that port to a switch.
That structure is why a rack matters. Without it, every cable ends in a different place, faults are hard to trace and any change means a hunt through ceilings. With it, moving a desk, adding a camera or swapping a switch takes minutes.
For the reader of this page, three situations come up most:
- A school or nursery adding Wi-Fi, access control and CCTV that all need cabling back to one point.
- A business or construction project fitting out an office, unit or new build with data points.
- A church, community building or large home where the router sits in a cupboard and the coverage is poor.
Step 1: Plan the rack size and the room
The first decision is physical. Rack height is measured in "U" (rack units). One U is 1¾ inches, or 44.45 mm, and a typical full-size rack is 42U, which holds just over 6 feet (180 cm) of equipment. A half-height cabinet is usually 18U to 22U. A switch or patch panel is normally 1U, so a 42U rack has room for dozens of them, though in practice you also need space for cable managers, power strips and a UPS.
For a small school office or home, a wall-mounted cabinet of 6U to 12U is common. For a larger building with a recorder, several switches and a UPS, a floor-standing rack is the sensible choice.
Dimensions are where mistakes happen, because modern equipment is deeper than older kit:
| Item | Manufacturer guidance |
|---|---|
| Network rack | 750 mm wide by 1070 mm deep to take cabling trunks |
| Server rack | 600 mm wide by 1200 mm deep for deeper servers and rear cable room |
| Heavy cable volume (200+ cables) | 750 mm width and 1200 mm depth or more |
| Standard enclosure | around 600 mm wide and 1067 mm deep |
The room matters as much as the rack. Dell's site planning guidance suggests a minimum ceiling height of 2.74 m for a 42U rack, and at least 91 cm of continuous clearance in front of and behind the rack. That is a data centre standard, but the principle holds in a comms room: you need to open doors, slide equipment out and get at the rear of the panels.
Plan for these before anything is ordered:
- Location. Central to the cable runs, not in a damp basement, a boiler cupboard or a space with no ventilation. Cable length to any outlet is limited, so a central position also keeps runs within range.
- Power. Enough sockets on a suitable circuit, with a UPS if the equipment should ride through a cut.
- Cooling and airflow. IBM's installation instructions give a maximum room temperature of 35°C for rack-mounted devices. A small cupboard packed with switches and a recorder can exceed that in summer.
- Growth. Dell's guide points out that existing cooling and power must be adequate for anticipated growth, not just today's kit. Leaving spare U and spare panel ports is far cheaper than replacing the rack in three years.
This is where a site survey earns its keep. We walk the building, trace the routes for cables and agree the rack position and size before quoting, so the quotation is fixed and the rack is not too small on the day.
Step 2: Mount and secure the rack
A loaded rack is heavy and top-heavy, so fixing comes before equipment.
The UK manufacturer Excel Networking states that racks and frames must be secured to the solid floor and/or wall so they remain stable when loaded with equipment and cabling, and that earthing kit must be attached to all rack components with the main earthing conductor connected. Schneider Electric's installation guidance says the rack must be bolted to the floor before equipment goes in, the heaviest items go first and lowest, and sliding-rail equipment must not be pulled out until 150 kg of equipment sits in the bottom of the rack.
A few practical points follow from that:
- Wall-mounted cabinets need a wall that can carry the full loaded weight, fixed into masonry or a proper backboard, not plasterboard alone.
- Floor-standing racks are bolted down with fixings suited to the floor, and levelled so doors and rails line up.
- Earthing is not optional. The rack is bonded to the building's earthing, and any loose electrical connection is a shock risk. Electrical connections to the building's supply must be made by a competent person.
- Lifting is a two-person job. IBM's instructions state that two or more people are required to install a device in a rack cabinet.
Mistakes here are costly: a rack that shifts under load strains every terminated cable behind it. Because our installs are done directly by one qualified engineer, the person who fixes the rack is the person who knows what will be hung from it.
Step 3: Lay out patch panels and equipment
A tidy rack follows a predictable order. Excel Networking's general rule is to start at the top with patch panels, optical fibre panels first and then copper, with the top position in each block of panels reserved for a horizontal wire manager and no more than two 1U panels before another manager. Switches sit beneath, then any recorders or servers, and the UPS and batteries at the bottom.
Why that order works:
- Heavy at the bottom. Tripp Lite's white paper notes that UPS units and battery packs belong toward the bottom to stop the rack becoming top-heavy.
- Panels and switches close together. Short patch leads stay neat. For dense cabling, the same paper says you may need 1U of horizontal management for every 1U of patch panels or switches.
- Cable managers keep bend radius. Sharp bends and tight bundles degrade performance, even if the link still lights up.
Equipment is mounted with cage nuts and screws on the rack rails, and each fixing is checked after tightening. Rack-mount rails for servers go in square and level, or the unit will bind when slid out.
One rule deserves emphasis. Excel Networking says cable bundles entering a rack from the top or bottom must be securely attached to cable tray inside the rack and never supported only by the rear management of the patch panel, which would put stress on the terminations. This is the difference between a rack that lasts and one that develops intermittent faults.

Step 4: Install and terminate the data points
Data point installation is where most of the labour and most of the quality risk sits. Each point is a length of cable run from the rack to a wall plate, then terminated at both ends.
Pulling the cable. Excel Networking's guide gives a maximum pull force of 110 N for a single cable, a maximum bundle of 24 four-pair copper cables, and says kinked cable must be removed and replaced. Over-pulling stretches the conductors and the fault may not show until later.
Terminating. For Category 6 and above, the same guide says each cable should be individually terminated and secured to the management bars, with the last twist no further than 13 mm from the termination point. One UK cabling firm's quality manual goes further and says the pair twist should be kept as close as possible to the termination. Outlets are terminated to the same wiring scheme (568-B unless specified otherwise) at both ends, and Category 6 cables are tied with hook-and-loop rather than tight cable ties.
Labelling. Excel recommends a full labelling scheme agreed before the installation starts, with labels at both ends of each cable and on outlets, panels, racks and patch cords. In practice, that means room number or name and panel port, so anyone can trace a point years later without opening a ceiling.

Testing. The quality manual cited above states that patch panels should not be tested until fully fixed in their final position with cables dressed in, and that copper links need a suitable level of tester with a current calibration certificate and every link passing. A cable that merely "gets a signal" is not a tested cable. You should receive a record of results for every point.
What a tidy install looks like
- Cables enter the rack at one point, supported on tray.
- Each cable runs to its own port, not bundled with others from different areas.
- Patch leads are short and the right length, in clear colours if you have separate networks.
- Labels are legible and match the schedule you were given.
- The room is left clean, with ceiling tiles back and holes made good.
Those are the points we put at the centre of every job: clear fixed quotations, tidy installation and aftercare once the system is live.
Step 5: Power, earthing and current UK electrical rules
Cabling in a building sits within electrical wiring rules. BS 7671 Amendment 4 was published on 15 April 2026, and the previous version remained valid only until 15 October 2026, so new designs now follow the amended standard. It adds Section 545 on functional earthing and bonding for ICT equipment and Section 716 on Power over Ethernet (PoE), including limits of 60 V ripple-free DC in dry locations and 15 V elsewhere.
PoE matters to anyone fitting cameras, door entry and wireless access points, because a single cable carries both data and power. It is a good reason to have one engineer design the cabling, the rack and the devices together rather than splitting them between trades.
If the building is new or undergoing major renovation in England, Approved Document R Volume 2 (effective 26 December 2022) requires high-speed-ready physical infrastructure up to a network termination point. That covers the building's infrastructure only: cabling and equipment beyond that point, which is the rack and data point work described here, is a separate job. Developers and main contractors on construction projects should plan for both.
Product safety is covered by BS EN IEC 62368-1:2024+A11:2024, the standard for information and communication technology equipment such as routers, servers and power supplies. Choose equipment that carries UK conformity marking.
Costs and what moves them
We do not publish prices, because a rack job depends on the survey: how many data points, cable routes, the building fabric, rack size, and whether Wi-Fi, CCTV or access control share the network. After a site survey we give a fixed quotation, so the figure is agreed before work starts.
The main drivers are:
- Number of data points and the distance of each run.
- Difficult routes: solid walls, occupied rooms, listed or older buildings.
- Rack size and what goes in it, including UPS and cooling.
- Testing and labelling documentation.
- Whether you need a maintenance arrangement afterwards.
Our view on racks
Most rack problems we see start before the rack arrives: nobody decided where it lives, how many points the building needs or who owns the labelling.
Our approach is simple. One experienced engineer surveys, specifies, installs and certifies the job, with no salespeople in between and no subcontractors. That means whoever promises you a tidy rack is the person who builds it.
We design networks to carry the security equipment our customers also need, such as CCTV, door entry and intercoms, along with remote monitoring and app control. A properly cabled rack with spare capacity makes each of those simpler to add later, and our aftercare and 24-hour support stay with the system once it is live.
Freddie
Getting a rack installed in Liverpool and the North West
We design and install Wi-Fi networks and structured data cabling for homes, schools, places of worship and commercial premises. Whether it is a nursery needing a cabinet that serves door entry and cameras, a business fitting out a floor, or a house that needs cabled points and reliable home security integration, the work starts with a survey and ends with a fixed quotation.
We cover Warrington and Wigan as well as Liverpool, St Helens, Southport, Ormskirk, Preston and Manchester. Our network work sits alongside intruder alarms, so one team can handle the whole building.
To talk through your project, see our Wi-Fi and networking service, or start from the Impact Security Systems homepage.

FAQ
How many units can a 42U rack hold?
A 42U rack has 42 rack units of mounting space, each 44.45 mm high. A 1U switch or patch panel takes one, a 2U or 4U server takes two or four. In real installations you leave space for cable managers, power distribution and growth, so you rarely fill all 42.
Where does a patch panel go in the rack?
At the top, with a horizontal cable manager above or between panels, and switches directly below. Short patch leads then link panel ports to switch ports. Incoming cables are supported on tray in the rack, not by the panel.
How do I choose between a wall-mounted cabinet and a floor-standing rack?
Choose by equipment and room. Wall cabinets suit a small number of points and a few switches. A floor-standing rack suits recorders, a UPS, many panels or future expansion. Either must be fixed to a wall or floor able to carry the loaded weight.
What should I get once data points are installed?
You should receive a labelling schedule matching the labels on outlets and panels, plus test results showing each copper link passing. Together they let anyone trace or fault-find a point later without guessing.
Sources
- Rack unit
- How to Choose an IT Rack
- Server racks buying guide
- Rack Basics white paper
- Dell Data Center Site Planning Guide
- Rack Mounting Instructions
- Installation Guide
- Installation Guidelines
- Installation Quality Manual
- BS 7671 Amendment 4 guide
- Approved Document R Volume 2
- BS EN IEC 62368-1:2024+A11:2024